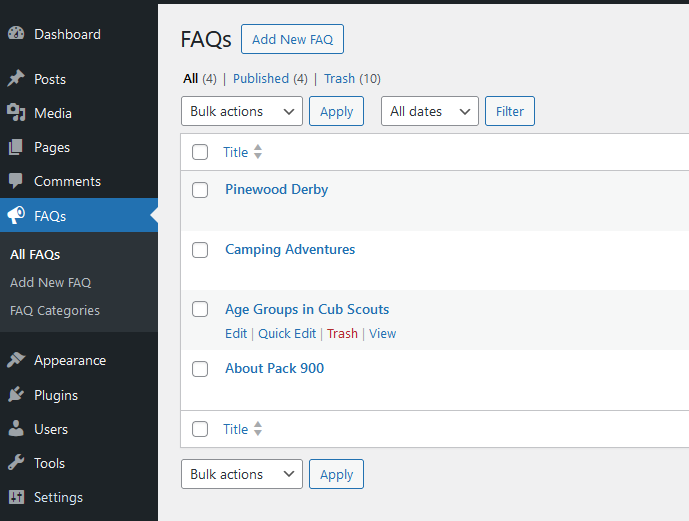
I’m currently building a site for my kids’ Cub Scouts pack. Specifically, we want an FAQ for new parents. Blog posts or a single, comprehensive FAQ page would technically work. However, this approach raises concerns about user experience. Imagine new parents scrolling blog posts about bake sales and camping trips to find the answer to a simple question like “What should my child wear to the first meeting?” Clearly, this wouldn’t be an ideal solution. So I decided to create a custom post type in WordPress.
A custom post type allows you to establish specialized structures for specific content needs. Imagine having a dedicated section for frequently asked questions (FAQs), a portfolio showcasing your work, or a custom recipe post type for your foodie clients.

While there are plugins available to create custom post types, this guide will focus on using the built-in register_post_type function. This approach offers greater control and flexibility, especially for projects requiring specific functionality.
This is part of a multi-part series. Part two will show you how to create a custom field for your custom post type in WordPress. Part three will show you how to create a custom taxonomy for your CPT. And finally, part four will walk you through creating a template for the front end.
Why Use the register_post_type Function?
Although custom post type plugins offer a user-friendly interface, the register_post_type function gives you granular control over every aspect of your custom content type. This is particularly beneficial for complex projects where you need to customize the behavior to your exact requirements.
Here are some reasons to consider using the code instead of relying on plugins:
- Fine-tuned Functionality: With plugins, you’re often limited to the features they provide. The
register_post_typefunction, however, grants you the ability to define precisely how your custom post type behaves. This includes aspects like what it supports (featured images, custom fields) and whether it has a dedicated archive page. - Lightweight and Efficient: By using core WordPress functionality, you can potentially enhance website performance by avoiding the need for additional plugins.
- Deeper Understanding: Utilizing the
register_post_typefunction strengthens your comprehension of WordPress’s internal workings. This knowledge is invaluable when troubleshooting complex website issues or customizing themes.
It’s important to acknowledge that there are also some drawbacks to consider:
- Steeper Learning Curve: If you’re new to WordPress development, the code might appear daunting at first. But I’ll do my best to walk you through the process step-by-step.
- Potential for Errors: Since you’re writing the code yourself, there’s always a chance of introducing errors. However, with a bit of practice and testing, you’ll become an expert at crafting custom post types.
Key Arguments Explained
The register_post_type function requires two primary arguments to define the characteristics of our custom post type. Here’s a breakdown of the key arguments I used within the provided code:
'labels' => array(...)– This section defines labels used throughout the WordPress admin area for our FAQs. For instance, instead of seeing “Post,” users will see “FAQ” when interacting with this custom post type. The code utilizes the_xand__functions to ensure proper translation readiness for your theme or plugin.'args' => array(...)– This array houses various arguments that define the functionality and behavior of our custom post type.
Create a Custom Post Type: Code Example
function create_faq_post_type() {

  $labels = array(
    'name'                => _x( 'FAQs', 'Post Type General Name', 'your-textdomain' ),
    'singular_name'       => _x( 'FAQ', 'Post Type Singular Name', 'your-textdomain' ),
    'menu_name'            => __( 'FAQs', 'your-textdomain' ),
    'parent_item_colon'   => __( 'Parent FAQ:', 'your-textdomain' ),
    'all_items'            => __( 'All FAQs', 'your-textdomain' ),
    'view_item'            => __( 'View FAQ', 'your-textdomain' ),
    'add_new_item'        => __( 'Add New FAQ', 'your-textdomain' ),
    'add_new'             => __( 'Add New FAQ', 'your-textdomain' ),
    'edit_item'            => __( 'Edit FAQ', 'your-textdomain' ),
    'update_item'          => __( 'Update FAQ', 'your-textdomain' ),
    'search_items'         => __( 'Search FAQs', 'your-textdomain' ),
    'not_found'            => __( 'No FAQs found', 'your-textdomain' ),
    'not_found_in_trash'  => __( 'No FAQs found in Trash', 'your-textdomain' ),
  );

  $args = array(
    'label'               => __( 'faq', 'your-textdomain' ),
    'description'          => __( 'Frequently Asked Questions for Cub Scouts', 'your-textdomain' ),
    'public'              => true,
    'can_export'           => true,
    'has_archive'          => false, // Set to true if you want a dedicated archive page for FAQs
    'hierarchical'          => false,
    'supports'            => array( 'title', 'editor' ), // Supports title and Gutenberg editor
    'menu_icon'           => 'dashicons-megaphone', // Choose a dashicon for the menu icon
    'labels'              => $labels,
    'taxonomies'          => array('faq_category') // Add your custom taxonomy for categories (optional)
  );

  register_post_type( 'faq', $args );
}

add_action( 'init', 'create_faq_post_type' );
Note the final line where we add the action that calls the create_faq_post_type() method on initialization.
Final Thoughts on How to Create a Custom Post Type in WordPress
By using the register_post_type function, you get the ability to create custom post types that speed up content management and enhance the user experience within your WordPress websites. This approach offers greater flexibility and control compared to relying solely on plugins. While there’s a learning curve involved, the ability to tailor your content structure precisely makes this skillset a valuable asset for any WordPress developer.
For more info on custom post types and the register_post_type function, I recommend checking out the WordPress docs: https://developer.wordpress.org/reference/functions/register_post_type/.
In the next part of this series, we’ll delve deeper into customizing your custom post type by exploring how to add custom fields, further expanding the functionalities of your custom content types.
